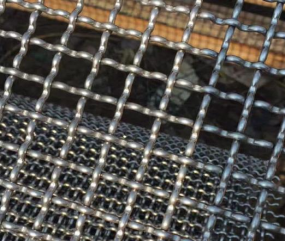
installing galvanized wire fence
Installing a Galvanized Wire Fence A Step-by-Step Guide
A galvanized wire fence is a durable and cost-effective option for property demarcation, livestock containment, or garden protection. The galvanization process involves coating the wire with zinc, which helps prevent rust and extends the life of the fencing. If you’re considering installing a galvanized wire fence, this guide will walk you through the essential steps to ensure a successful installation.
Step 1 Planning Your Fence Line
Before you begin the installation process, it’s crucial to plan your fence line. Decide the length and shape of the fence, taking into account any slopes or obstacles on your property. Use stakes and string to mark the outline of your fence, ensuring it follows a straight line and that the corners are at right angles. Don’t forget to check local regulations and property lines to avoid disputes with neighbors.
Step 2 Gather Your Materials and Tools
To install a galvanized wire fence, you’ll need the following materials
- Galvanized wire (field wire or fencing roll) - Fence posts (wooden or metal) - Post caps (if using wooden posts) - Concrete (for securing the posts) - Fence staples or ties - Gate hardware (if including a gate)
In addition, gather the tools necessary for the installation, including
- Post hole digger or auger - Level - Hammer or power driver - Wire cutters - Tensioning tool (if needed)
installing galvanized wire fence

Step 3 Installing the Fence Posts
Start by digging holes for your fence posts. The depth of the holes typically depends on the height of the fence, but a common guideline is to dig at least one-third of the post's length underground. Place the posts approximately 6-8 feet apart, depending on the type of wire and your specific needs. Once positioned, pour concrete into the holes to secure the posts, ensuring they are level and plumb. Allow the concrete to cure as per the manufacturer's instructions before proceeding.
Step 4 Attaching the Galvanized Wire
Once the posts are set, it’s time to attach the galvanized wire. Begin at one end and unroll the wire along the fence line. Make sure it is taut to prevent sagging. Use fence staples or ties to secure the wire to the posts, starting at the bottom and working your way up. For additional stability, you may want to use a tensioning tool to stretch the wire before securing it.
Step 5 Finishing Touches
After installing the wire, inspect the entire fence for tightness and security. Cut off any excess wire neatly, ensuring there are no sharp edges that could pose a safety hazard. Install any gates or additional components as needed, securing them per the manufacturer’s guidelines.
Conclusion
Installing a galvanized wire fence can be a straightforward DIY project with careful planning and execution. By following these steps, you can create a sturdy and effective fence that will enhance your property's safety and aesthetics. Remember to maintain your fence regularly, checking for any rust or damage, to ensure its longevity for years to come.
-
Space-Saving Chain Fence Hacks Vertical Gardening with Cyclone MeshNewsJul.16,2025
-
Innovations in Iron Nail Wire Production for Modern ConstructionNewsJul.16,2025
-
Creative Uses of Wire Netting Fence in Modern Landscape DesignNewsJul.16,2025
-
Barbed Wire Fence Innovations in Anti-Climb TechnologyNewsJul.16,2025
-
Architectural Uses of Umbrella Nails for Aesthetic Roof DesignsNewsJul.16,2025
-
Architectural Uses of Razor Barbed Wire in Secure Urban DesignNewsJul.16,2025


