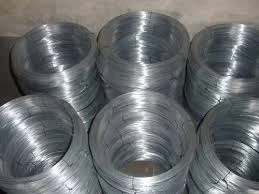
securing chicken wire
Securing Chicken Wire A Comprehensive Guide
When it comes to agricultural and gardening practices, securing chicken wire effectively is an essential skill that every farmer or gardener should master. Chicken wire is a versatile material widely used to protect plants, enclose animals, and divide spaces within yards or farms. However, simply installing chicken wire is not enough; ensuring that it is securely placed can make a significant difference in preventing the unwanted intrusion of pests or predators. This article will delve into the importance of securing chicken wire and provide tips and techniques to do so effectively.
Understanding Chicken Wire
Chicken wire, also known as poultry netting, is a hexagonal wire mesh typically made of galvanized steel. It is designed primarily for enclosing chickens, hence its name, but its applications extend to a variety of other uses, including fencing for small pets, garden bed protection, and even crafting projects. One of the main advantages of chicken wire is that it is lightweight and relatively easy to handle, making installation straightforward for most individuals.
Why Securing Chicken Wire is Crucial
One of the primary functions of chicken wire is to serve as a barrier. While it is effective in keeping chickens and small animals contained, it is not infallible. Predators like raccoons, foxes, and dogs can cause significant damage if the wire is not secured properly. Loose or poorly installed wire can create entry points for these animals, leading to potential chaos in your backyard or garden. Additionally, securing the wire can protect against the elements, ensuring that it remains intact through wind, rain, and snow.
Steps to Secure Chicken Wire Effectively
1. Choose the Right Gauge The first step to securing chicken wire is selecting the right gauge. Heavier gauge wire is more durable and better suited for heavy-duty applications. Standard chicken wire is often 19 or 20-gauge, but if you are dealing with aggressive animals, consider using 16-gauge instead.
securing chicken wire

2. Proper Placement When installing the chicken wire, ensure that it is placed flush against the ground. This can help prevent digging animals from burrowing underneath. If necessary, bury the bottom several inches below the soil to secure it further.
3. Use Strong Supports Utilize sturdy posts to support the chicken wire. Wooden or metal posts spaced no more than 6 to 8 feet apart will help maintain tension in the wire and prevent sagging. Make sure these supports are adequately anchored in the ground.
4. Tensioning the Wire Tension is key when securing chicken wire. As you attach the wire to the posts, ensure there is enough tension to avoid loosening over time. You can use wire ties or staples to secure the wire to the posts firmly.
5. Reinforcing Corners and Joints Pay special attention to corners and joints where the wire meets. These areas are more susceptible to breaches. Use additional wire ties or clips to reinforce these junctions, ensuring they are tightly secured together.
6. Regular Maintenance Once your chicken wire is installed, regular inspection is essential. Look for any signs of wear, tear, or loosening. Repair any damage immediately to maintain the integrity of the barrier.
7. Aesthetics and Functionality If your chicken wire installation is alongside garden features or landscaping, consider using decorative wooden panels or fencing in conjunction with the wire. This not only enhances the aesthetics but also provides added support.
Conclusion
Securing chicken wire is a vital aspect of maintaining a safe and effective barrier for both your animals and plants. By following these steps and staying proactive with maintenance, you can ensure that your chicken wire remains a robust protective measure against not only unwanted intruders but also the harsh elements of nature. Whether you're a seasoned farmer or a budding gardener, mastering the art of securing chicken wire will go a long way in fostering a thriving, protected environment for your chickens and plants alike.
-
Space-Saving Chain Fence Hacks Vertical Gardening with Cyclone MeshNewsJul.16,2025
-
Innovations in Iron Nail Wire Production for Modern ConstructionNewsJul.16,2025
-
Creative Uses of Wire Netting Fence in Modern Landscape DesignNewsJul.16,2025
-
Barbed Wire Fence Innovations in Anti-Climb TechnologyNewsJul.16,2025
-
Architectural Uses of Umbrella Nails for Aesthetic Roof DesignsNewsJul.16,2025
-
Architectural Uses of Razor Barbed Wire in Secure Urban DesignNewsJul.16,2025


